Applying DVD audio track to Blu-ray rip
Last updated 12 Nov 2023
I came across an old Region 2 DVD of Antonioni's Blow-Up and noticed it had a commentary track (by author Peter Brunette) and wanted to apply it to a rip of Criterion's Region A Blu-ray release. This is the second time I've done something like this so I wanted to record how I did it for future reference.
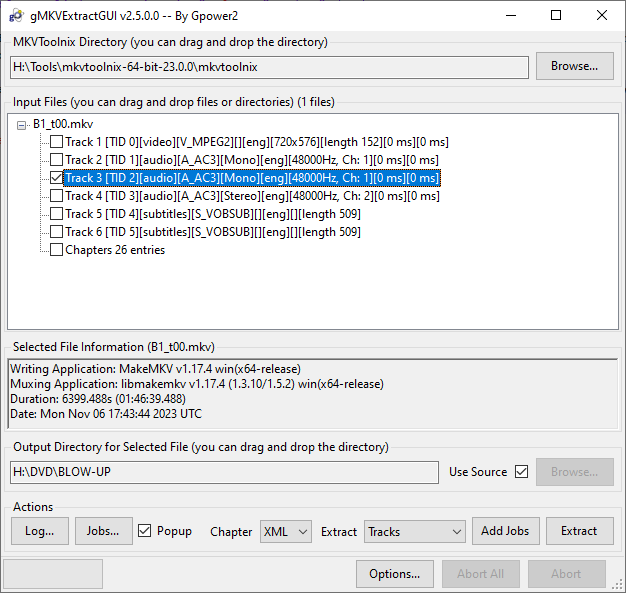
Using MakeMKV, I extracted both discs to .mkv files. Checking the resulting files in VLC (Tools > Codec Information), I can see the DVD has a framerate of 25FPS with a length of 1:46:39 whereas the Blu-ray is 23.976FPS and has two additional logos at the beginning (for a length of 1:51:41). Using gMKVExtractGUI from MKVToolNix we can extract the commentary track to a single .ac3 file.
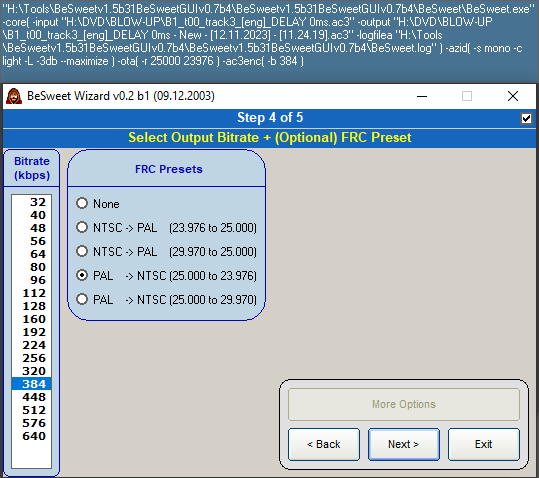
Since the discs are at different framerates, we need to use a tool called BeSweet to slow the audio down. There are a few GUIs available for this, but I've had mixed success with them - BeLight sometimes works, sometimes looks like it's worked but hasn't applied all your settings and sometimes just produces blank files. BeSweetGUI can take you through a wizard to do what you need but then fails to produce a file at the end - it will show you the command it's compiled at the top of the screen so you can copy that and run it from a CMD prompt (not Powershell). It seemed to create the wrong path to the executable so you can run it from the directory with the BeSweet.exe file and just remove the full path from the command (leaving just besweet.exe). The part we're concerned with here is changing the framerate from 25 to 23.976 (selecting it in the wizard adds the -ota( -r 25000 23976 ) option to the command).
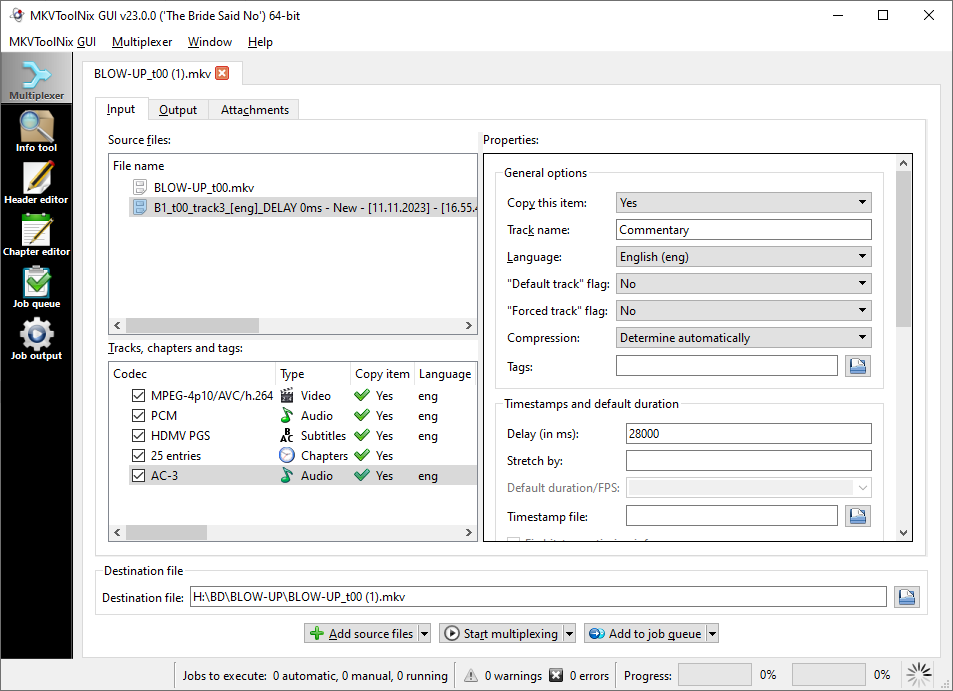
Now we can add the Blu-ray rip and the new .ac3 file into MKVToolNix GUI, add a label to the audio track, make sure it's not the default track and set a delay - the additional logos added about 28 seconds so I start with 28000, then press Start multiplexing to create a new file.
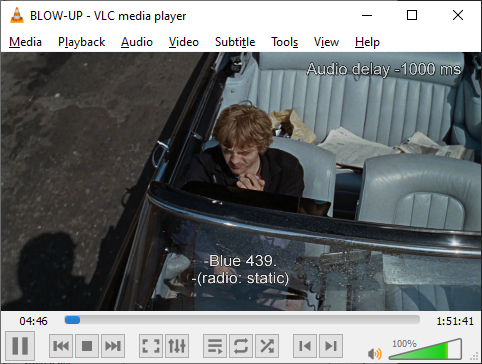
If you open this file in VLC, select the new audio track and then try to find a section of dialogue where the film audio is used in a gap from the commentary, you can shift the audio forward and back in 50ms increments with j and k - once you've determined the correct delay, you can go back to MKVToolNix and change the offset. In this case, I needed to bring it forward a second so I just created a new file setting the delay to 27000.
Return to roddie.digital / top